
This time four years ago, I was scrambling to finish the semester’s final projects in my senior year of college. In other words, highly suggestible to distractions. I was chatting with my mother on the phone, already a distraction, and she mentioned in passing the idea of making advent calendar numbers out of gingerbread. To which I was like, I will drop everything to complete this task IMMEDIATELY.
I’ve done it again every year, always drawing my own brand new set of numbers and executing them in cookie and icing. For the fifth year, I thought I’d tell you all about my Type A bullshit tips and tricks and secrets for how to do it from start to finish, should you wanna plan to decorate cookies for your roommates or family this year, or have an outing to avoid.
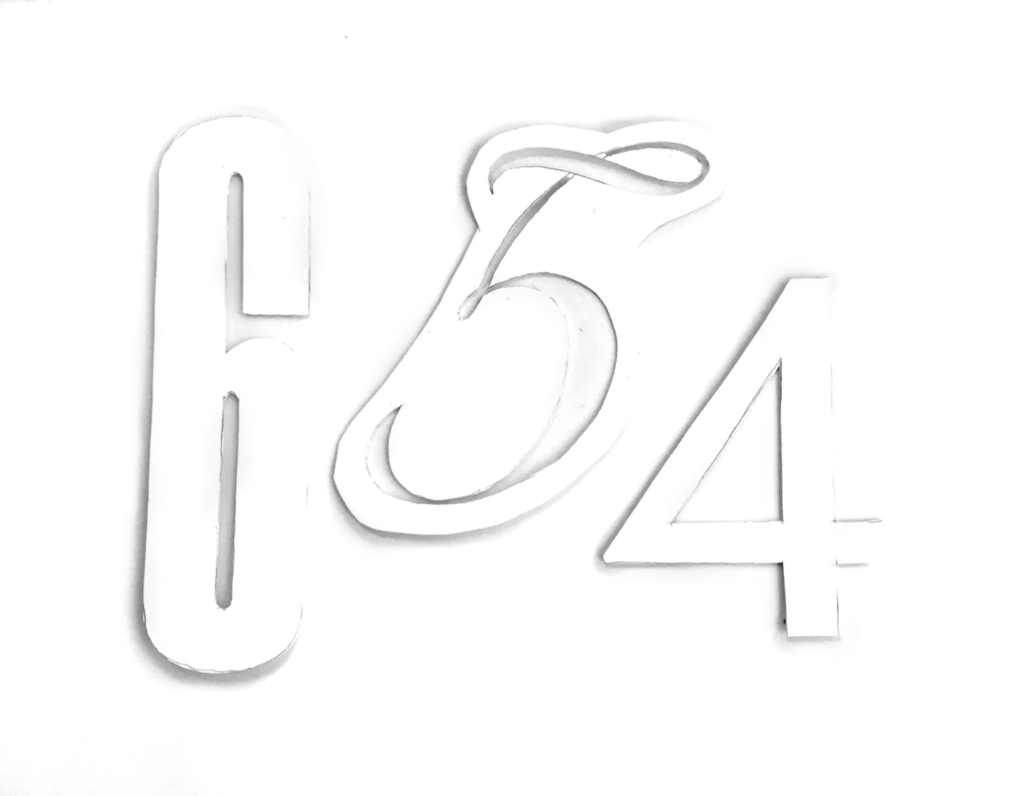
Step 1: Make templates
I’ve always drawn my numbers digitally in Robofont, but you could draw them on paper if you’re competent at that sort of thing. Or start with a typeface! Check your EULAs for cookie.
Print out your numbers 0 through 9, or as I’ve been known to do, trace from a laptop screen in a dark room. Think around 2-4″ tall, on cardstock is best. Then cut them out with an X-Acto on a cutting mat. In the past I’ve always cut them out around their actual outlines, but this year I went a more delicate route with some numbers, so I cut them out like stencils.
Step 2: Bake cookies
I use a Martha Stewart recipe, found here. It makes a whole lot, which I appreciate because it means I can eat dough at my leisure without worrying about running out. If you hate fun, it also freezes well.
- 6 cups all-purpose flour, and more for sprinkling on your work surface
- 1 teaspoon baking soda
- ½ teaspoon baking powder
- 1 cup (2 sticks) unsalted butter
- 1 cup packed dark brown sugar
- 4 teaspoons ground ginger
- 4 teaspoons ground cinnamon
- 1 ½ teaspoons ground cloves
- 1 teaspoon finely ground pepper
- 1 ½ teaspoons coarse salt
- 2 eggs
- 1 cup unsulfured molasses
- Mix the flour, baking soda and baking powder in a medium bowl; set aside.
- Using an electric mixer in a large bowl, cream together the butter and brown sugar on high for a couple minutes until they’re light and fluffy. Mix in the salt and spices, then mix in the eggs and molasses. With mixer on low, add the flour mixture and mix just until it comes together.
- Make a ball and then press into a big flat disc shape, wrap in plastic, and refrigerate for at least an hour.
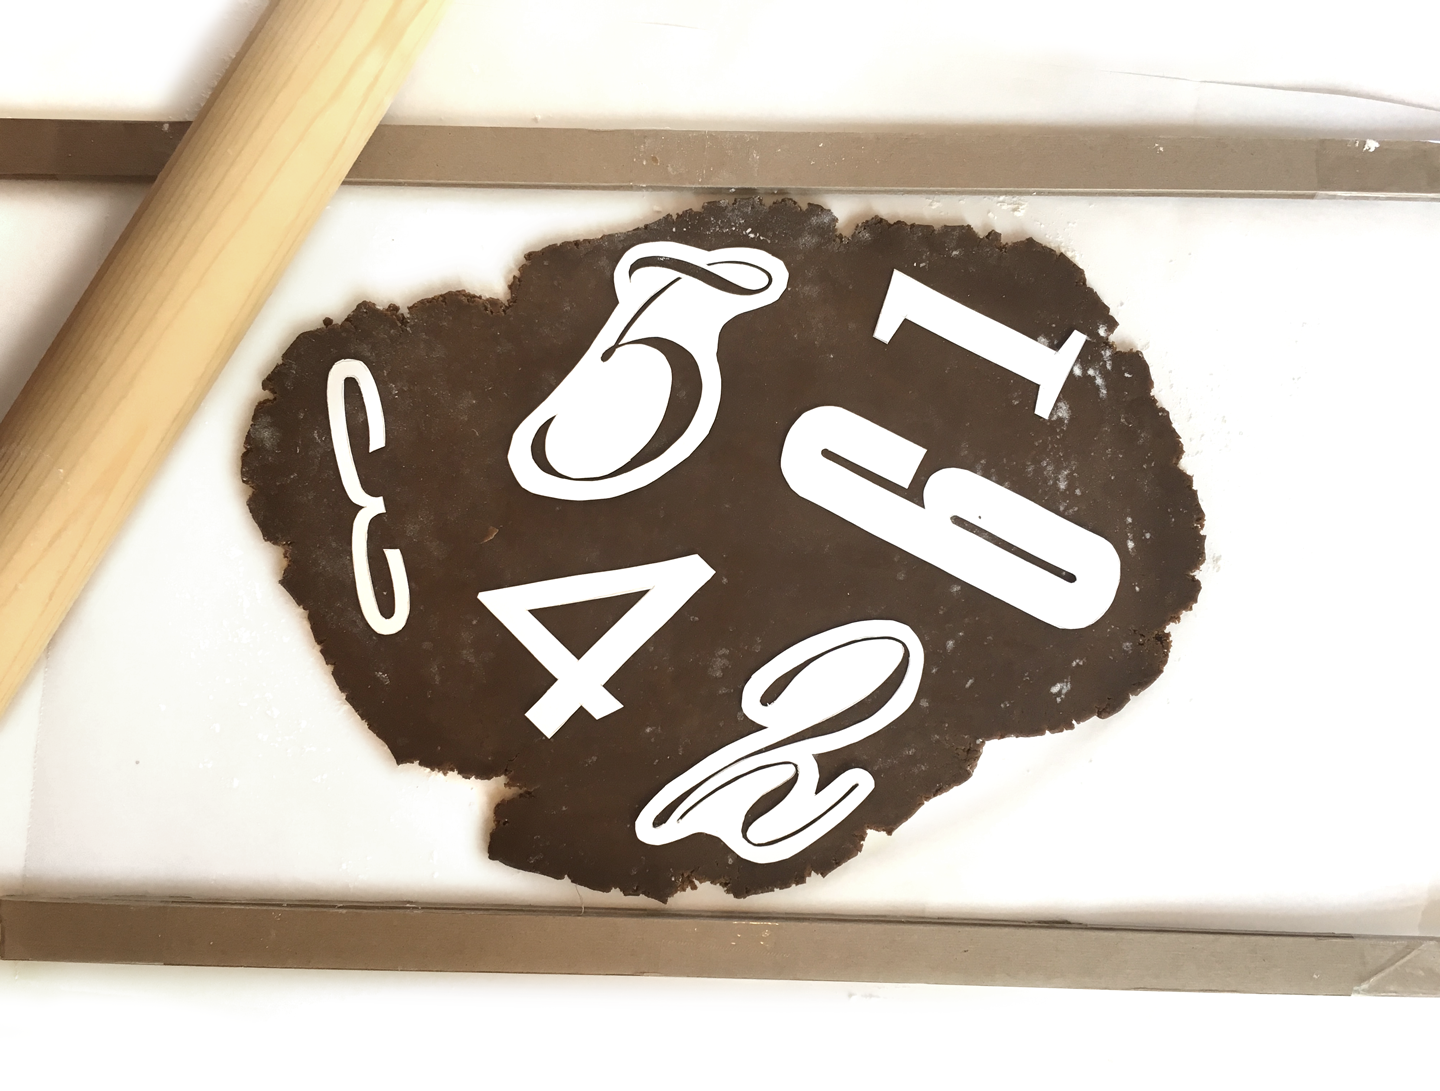
- Get a handful of the dough and a big baking sheet or pan. Instead of rolling onto a countertop, you’re either going to roll onto lightly floured parchment paper to be transferred onto the pan, OR lightly flour and roll the dough out straight onto the pan (if it has sides, turn it over and use the back). This is so you don’t have to worry about any distortion from picking up unbaked cookies and moving them individually. Roll the dough out ¼″ thick, as evenly as possible. Sometimes I make ¼″ tall rolling guides out of taped-together cardboard to give it that extra lil somethin’. (Precision. The something is precision.) ¼″ dough makes cookies that are crunchy around the edges but not all the way through, which is what I like, but roll thinner for a completely crisp cookie.
- Get your templates and arrange them with enough space that the number outlines are never much closer than half an inch away from each other. Get as many in as you can, but it’s gonna take you several pans of cookies to do them all.
- Preheat oven to 350°.
- X-Actos or Olfa blades are my preferred tools to cut the shapes because art school. You could also use the tip of a small pointed knife as long as you don’t mind dulling it on the metal pan, or a rotary cutter if your shapes aren’t too detailed. Whatever your life story, cut around the templates with a ¼″ margin, or directly around any stencil templates. Dragging a blade does not work; it’s easiest to use a quick up and down sawing motion, moving slowly around the outline.
- Pick up the excess dough, and touch up any rough edges on shapes if needed.
- Pop in the freezer for five minutes.
- Bake for 12-14 minutes, Martha says till “crisp but not dark.” They shouldn’t puff up or bloat very much, if they do, the roll was too thick. Roll the dough a little thinner next time, no one else will notice.
- Repeat rolling, cutting, freezer-ing and baking until you’ve got all your numbers from 1 through 25. It goes faster if you have two pans in operation at a time. I like to make a checklist with the numbers 1-25 so I only have to count them once because…I…don’t know why.
- Leave them to cool completely before icing.

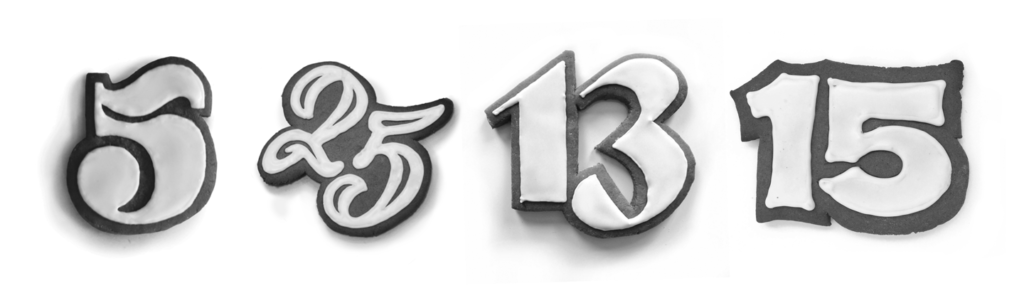
Step 3: Icing
Isn’t it cool how I split this into three steps, which doesn’t seem like a lot of steps, but each of them is pretty complicated? I know.
- 4 cups powdered sugar
- 5+ tablespoons water
- 2 tablespoons meringue powder, or the same amount of egg whites whipped until frothy and then only use 3+ tablespoons of water
- Piping bags + coupler (lil plastic thing that holds the piping tip in place)
- Small round piping tip, I use size 2 for outlines and size 3 for filling
- Optional: food dye*, preferably gel but liquid’s okay
*Two notes about food dye, because it sucks and I hate it. First: DO NOT trust organic food dye unless you’re cool going with the colors of pallid sadness. I would love to be proven wrong about this but, so far, no. Second: If you’re going red, and you see a “No-Taste Red” option, take that little bottle and hold it close. I remember seeing it in my mom’s fancy home cake decorating kit, and when shopping this year passed it up for the more jovial sounding “Christmas Red,” assuming that baking technology had advanced since the early ’90s and why would they make bad tasting things anymore. Reader, I had mixed my icing to barely a Christmas Pink when I tasted it, gagged, rinsed my mouth out, brushed my teeth, ate a pickle, and later on kissed my partner who said, “yeah there’s still something weird there.” Don’t be like me.
- Prep your cookies: match templates to cookies. Gently hold templates in place and lightly trace around or inside them with a mechanical pencil, so that you know where to draw with your icing. Disclaimer: literally poison. Look, if you really want to you can buy a food-safe marker or use a needle to etch into the cookies, but what can I say, I love danger.
- Combine sugar, 5 or 3 tablespoons of water, and meringue powder or egg in a bowl. If you’re going to add liquid food dye later, add 1 fewer tablespoons water. The deal with adding liquids is to do it slowly, since it’s easy to make the icing too runny and requires very much powdered sugar to dry it out again. Whisk for one minute.
- If you’re doing colors, separate into different containers for different colors, and stir in food dye slowly until you get your desired hue. It can take a lot of liquid food dye to make bright colors, which is why we left it dryer. Gel food dye is *Italian chef kissing hands gesture* though. The icing should have a consistency thicker than toothpaste. Cover container(s) when not in use.
- Assemble and fill your piping bag with no more than half of the icing in that color, and pipe just on the inside of the outlines you’ve drawn. Right after while it’s still wet, I like to touch the edges up with my trusty X-Acto to adjust lines and curves as needed, and get good sharp corners. Repeat for the rest of the cookies and colors.
- Take the rest of the icing in that color and add water a few drops at a time, until it still heavily coats a spoon, but you can drizzle it and the surface flattens smooth and shiny after a second.
- Put icing in the piping bag with a larger tip, and squeeze a generous amount inside your icing lines, then use the tip without squeezing to nudge the icing around and get into corners.
- Allow icing to dry overnight before touching the icing or packaging the cookies.

More Cool Icing Piping Tips for the Uninitiated. Unin-ice-iated? Hey, what about, shut up
- A gallon bag with a corner cut off makes a great piping bag.
- You can also fashion yourself a piping bag out of just parchment paper, to use with or without a piping tip.
- If when you’re mixing your icing for piping you’re not sure it’s the right consistency, you can test it by putting a little bit of icing into only the piping tip, and pressing it through with your finger onto a cookie. This is like, sort of a mess, but beats getting all your icing in the bag and it not coming out right. When you press it through, it should stay in firm, distinct lines, but be wet enough that it sticks to the cookie after a second. If it’s too dry, slowly add water a drop or two at a time.
- When beginning a new line of icing, ice in place for just a moment to anchor the stroke, before smoothly proceeding into a line. Same with ending a line, and with turning sharp corners.
- To get smooth icing lines, you should be applying the pressure mostly sideways, and only a little bit down into the cookie. Applying too much pressure downward makes lines bumpy.
- If you’re shaky, work with the elbow of your dominant hand securely leaning on your work surface.
- Rotate the cookie as much as you need so that whatever you’re angle you’re currently working on is the most comfortable.
- If you mess up a line, scrape it off with a knife and if necessary dab clean with a slightly-damp paper towel.
Done! Now you have cookies! You can absolutely eat one a day until whatever date you want, but I feel like now I know you well enough to say I consume mine immediately.
I started penning this post a couple months ago. Like I mentioned, this is the fifth batch of advent gingerbread I’ve made, and I wanted to share what I’ve learned in case it’s helpful to someone. Several weeks ago I thought of what numbers to use that would be both a bigger challenge to my icing skills, and cloyingly sentimental. I barely have words for what these past few weeks have been like. Everything is deeply not okay. Broadcasting levity or distractions from the gravity of what’s happening feels wrong, even as a coping mechanism. So I feel weird about that, but at the same time, telling people I love them profusely is one of only a handful of actions that make sense to me right now. So here I am, sending love back to all the people in our industry who have ever extended a welcoming hand to me. If you’re reading this you know who you are, and I hope you’re doing well, you’re the best. Your warmth, careful instruction, chats, high-fives, encouraging texts, thoughtful guidance, beers, hugs and just general believing in me (and to some of you, lending me your numbers!) have meant absolutely everything to me ever since I showed up to draw type. Thank you, thank you, thank you. Especially to you, Dai. I tell you sometimes, but I like you the most.

- Embury, Victoria Rushton
- Unreleased, Dai Foldes
- Bureau Grot, David Berlow
- Dunbar, CJ Dunn
- Tangier, Richard Lipton
- Kultur (Unreleased), Nick Sherman
- Garamond FB, Jill Pichotta
- Jada (Unreleased), Elizabeth Carey Smith
- Bungee, David Jonathan Ross
- Lucky Duck (Unreleased), Lila Symons
- Materot (Unreleased), Dyana Weissman
- Hobeaux Rococeaux, James Edmondson
- Dover Serif, Rob’in Mientjes
- Pique, Nicole Dotin
- Cortado Script, Jesse Ragan and Ben Kiel
- Mallory, Tobias Frere-Jones
- Galea, Isabel Urbina Peña
- Robinson, Greg Gazdowicz
- Nordvest, Nina Stössinger
- Gasket, Cyrus Highsmith
- Brim Combined, Jamie Clark
- Bely Display, Roxane Gataud
- Blesk, Ksenya Samarskaya
- Roster, Matthew Carter
- Renata, Laura Worthington