
My initial motivation in learning lettering was to be able to create perfect, elaborate, admiration-inducing letters. In 2011 I completed a type design masters at EINA school in Barcelona, which also opened up the world of calligraphy and lettering in all sorts of styles for me. I ended up loving the brush. I wasn’t too good at first but after additional workshops, reference books —Brush Lettering: An Instructional Manual of Western Brush Lettering by Marilyn Reaves was particularly helpful— and hours of after-work practice, I finally tamed it. I even gave a brush lettering class. I felt pretty good about it. Then… I felt stuck. Most of what I was achieving was by the book but somehow felt bland and impersonal.
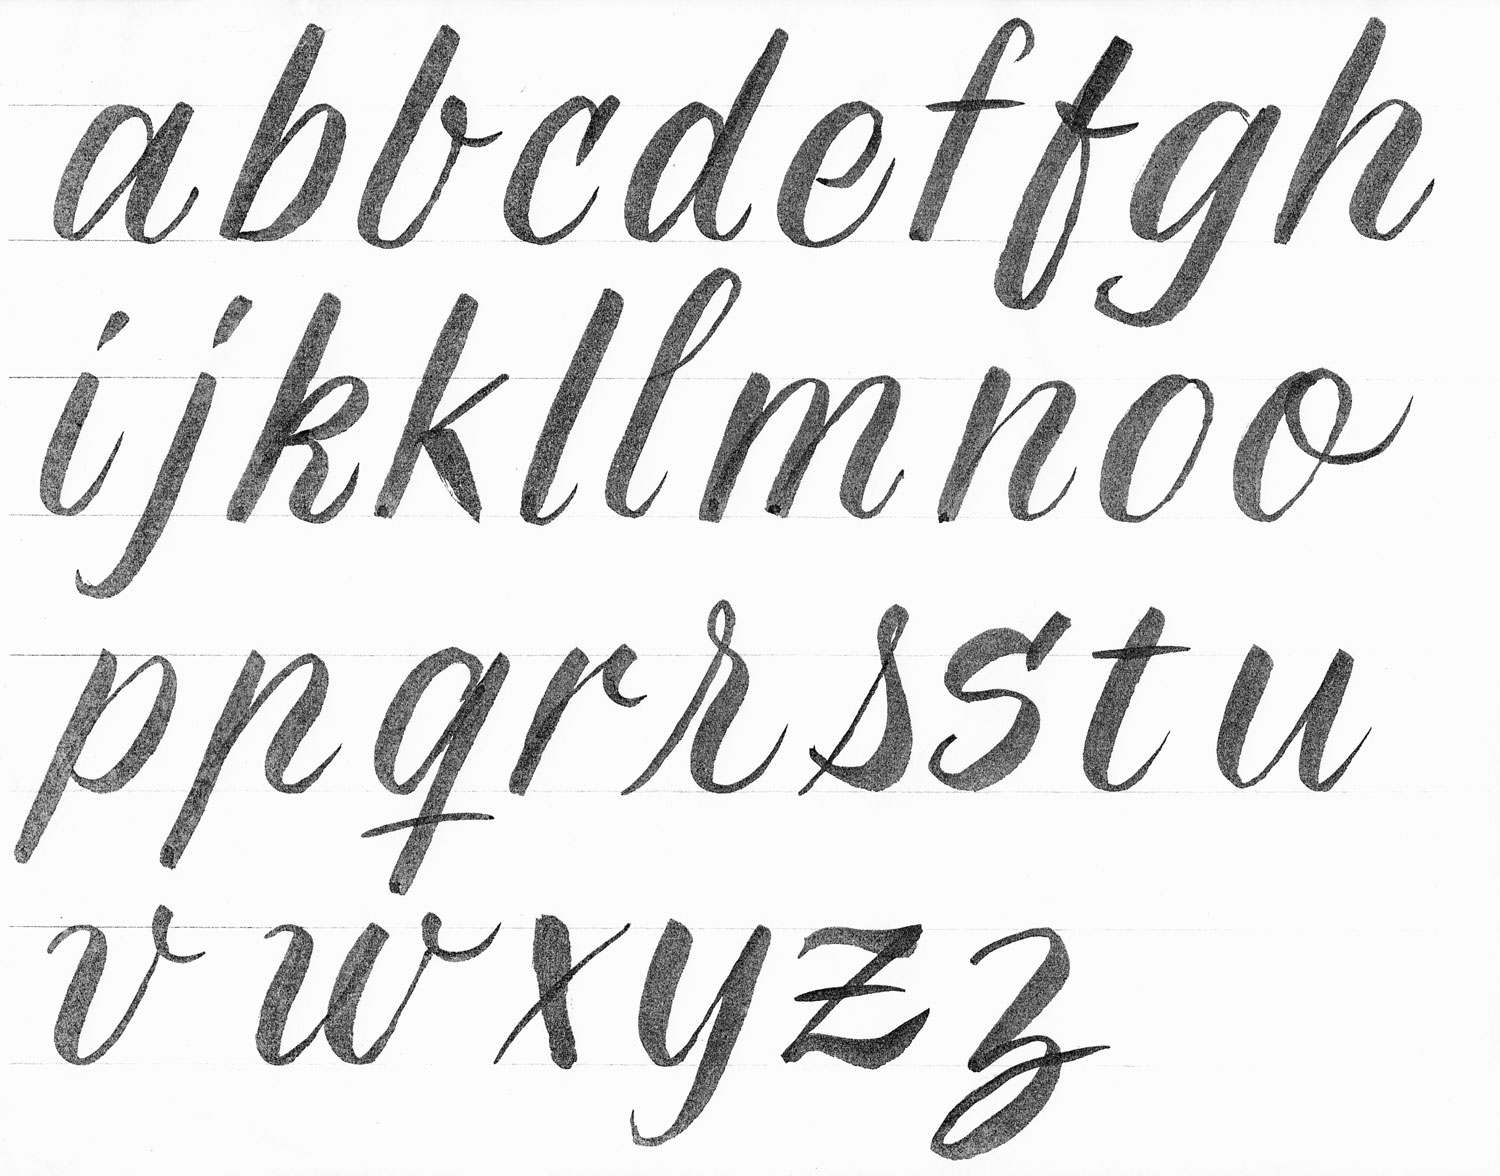
Reference alphabet I prepared for the brush lettering class I gave at the Spotify offices in Montreal in 2015.
At the same time, I started bumping into new handlettering styles that got my attention. Working in the realm of book cover design, I was constantly looking at book covers and graphic design pieces (hello bookstores, HELLO Pinterest). These lettering styles, which I found so charming and expressive, drew me in. And what was interesting was that they were looser and more flawed than my initial lettering-has-to-be-perfect-and-complex idea.
So I started to closely observe and copy them, hoping some expressiveness would rub off on me. For each, I attempted to come up with the entire alphabet, lowercase and uppercase. Then, I did my best to write new words with those letters.
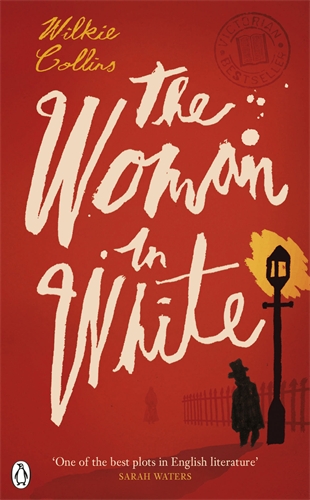
Process example: shamelessly copying Richard Green’s gorgeous, crooked lettering on The Woman in White cover (click on image to see the original reference), then deducing the rest of the letters.
After repeating this process time and again, I started building a personal list of tricks that I could follow whenever I wanted to liven up my handlettering and make it express a particular emotion, whether using the brush or another tool. It is surely a subjective and improvable list, but I thought I would share it here in case it could help anyone feeling as stuck as I was.
Irregularity
First trick I learned: if you feel your handlettering is stiff and emotionless, try incorporating irregularity. It works like magic. And the beauty of it is that you can basically apply it to everything:
• Letter size: by varying the letter size from one letter to the next (see Fig. 1).
• Baseline: by making the invisible line on which letters sit anything but straight (see Fig. 1, 2 and 6).
• Letter spacing: by using inconsistent negative spacing between letters (see Fig. 3), whether they are connected or unconnected.
• Letter inclination: by mixing in letters with different slant angles (see Fig. 4).
• Line thickness: by ignoring the thick-thin logic of “proper” brush lettering or just randomly changing the line width in more monolinear lettering styles (see Fig. 4 and 5).
• Line steadiness: by making it waver or tremble (see Fig. 6).
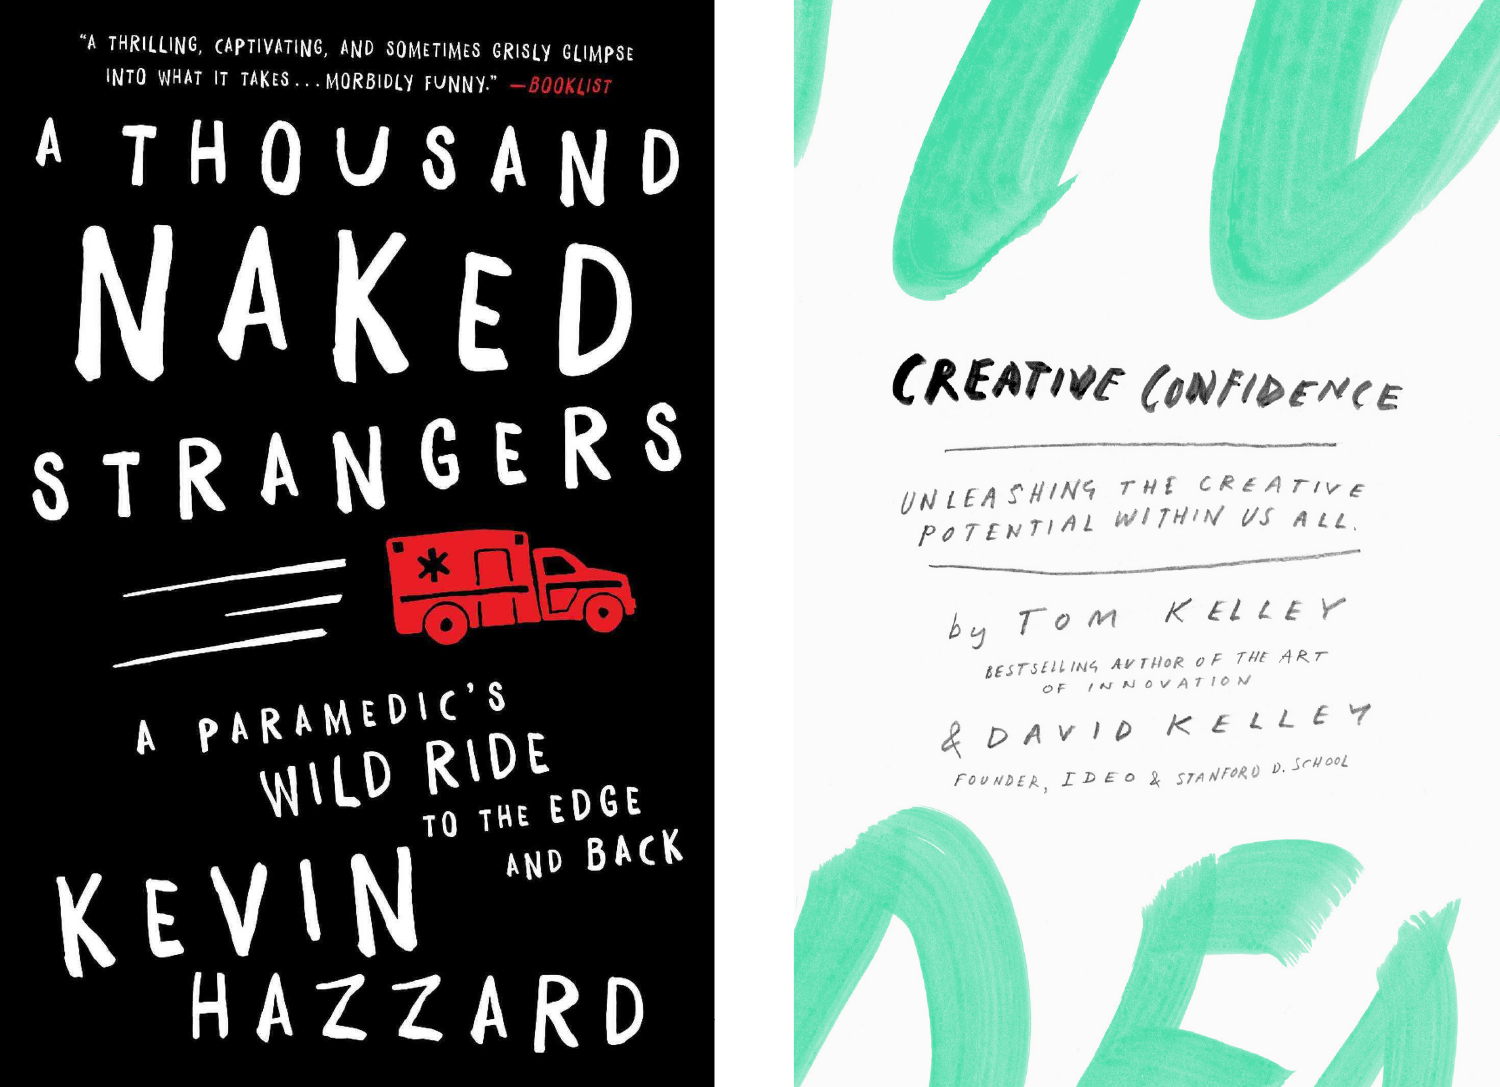
Fig. 1 (left). Cover design by Pete Garceau. Note how the size of the letters keeps changing, also resulting in a delightful dancing baseline. Fig. 2 (right). Cover design by Martin Kay. I particularly appreciate the unsteadiness of the baselines.
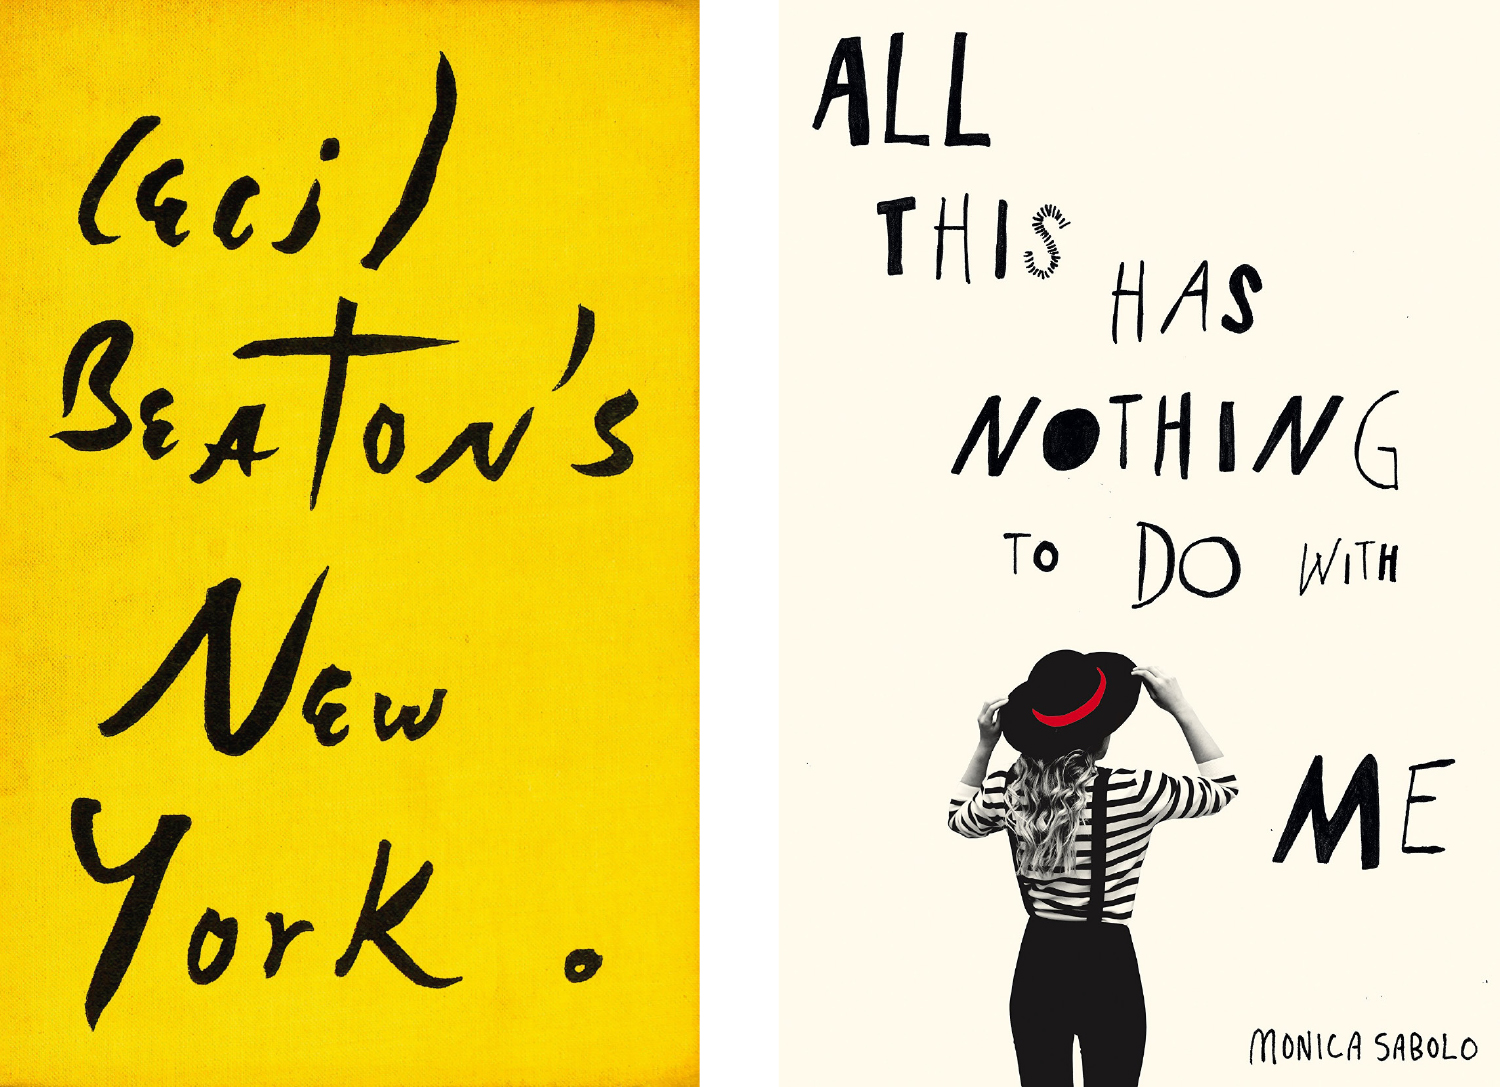
Fig. 3 (left). Note the uneven spacing between letters in this free-flowing composition by Cecil Beaton. Fig. 4 (right). Cover design by Justine Anweiler. The unexpected changes in letter inclination and line thickness make this lettering specially lively for me.
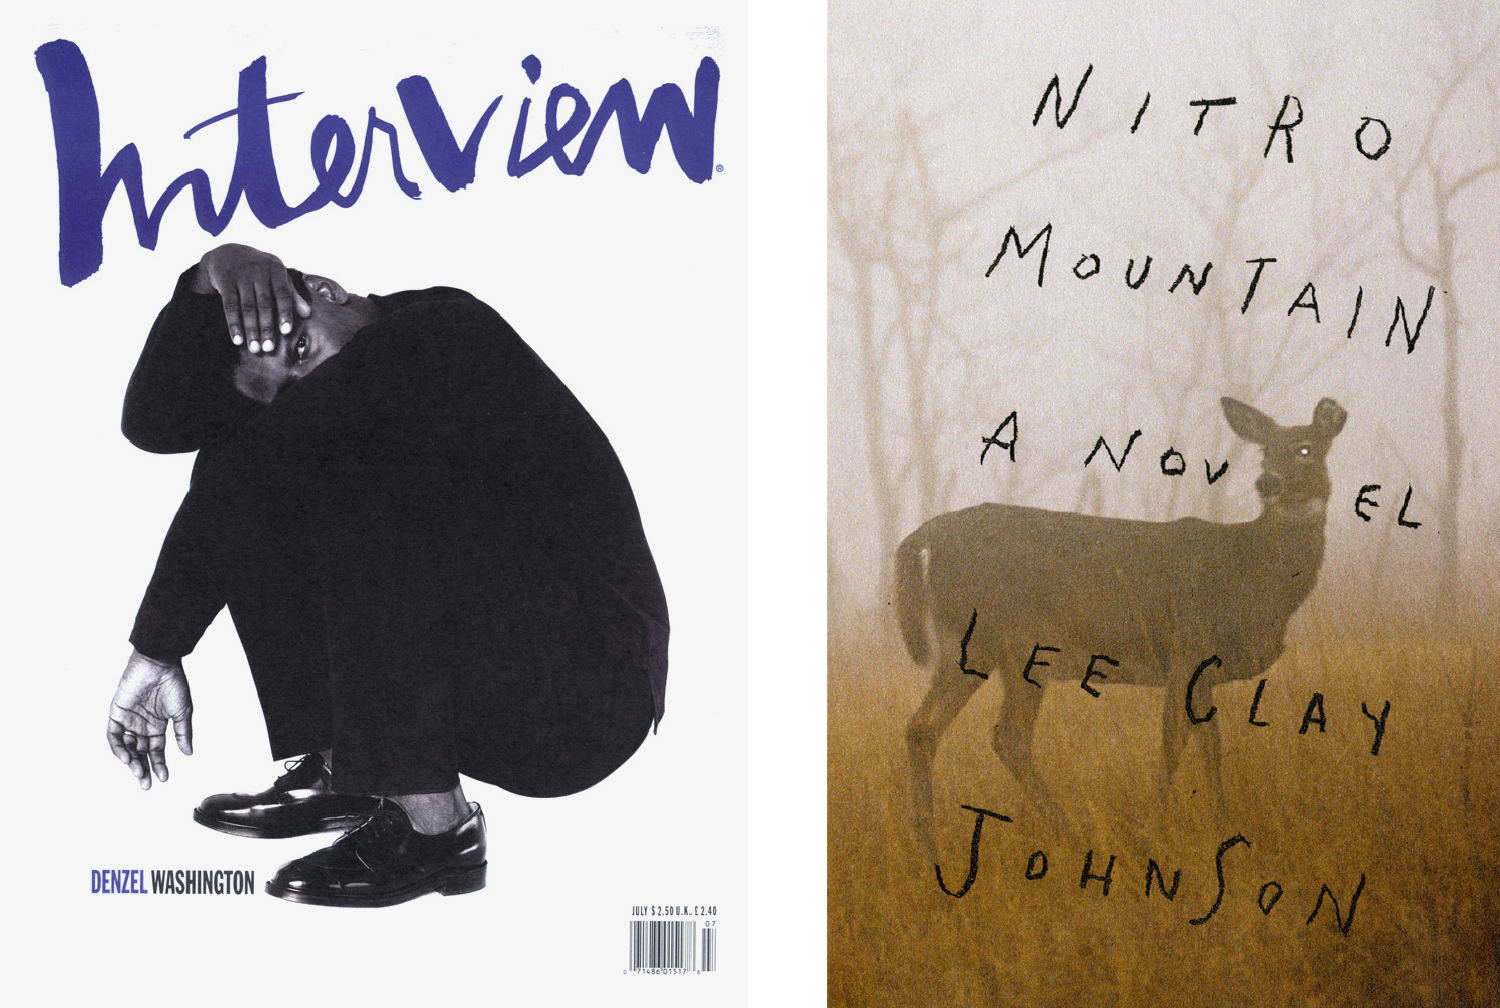
Fig. 5 (left). This version of mythical magazine Interview logo is a great example of a brush lettering thick-thin contrast lawbreaker. Fig. 6 (right). Cover design by Oliver Munday. The subtly shaky letters add to the creepy atmosphere of the cover. Plus the dropping baseline is not an indicator that things are going to go so well.
I didn’t do any of this naturally so having a “loosening up” list to go through was quite helpful. I’d recommend experimenting with each aspect separately, then with various at once to see what happens. The more irregular, the more charmingly scruffy and emotional it will look.
A range of emotions
With stiffness out of the way, I went further and set out to organise additional tips depending on the type of emotion I wished to express. Some of these can be applied individually while others can be stacked together for a greater effect.
Straightforward, casual
• Whether using lowercase or uppercase, keep letters basic. Plain print letters work great for this purpose (see Fig. 7 to 10).
• Pay attention to the length of ascenders and descenders when setting lowercase: the shorter, the more direct the look (see Fig. 9), while the longer will add a touch of naiveté (see Fig. 10).
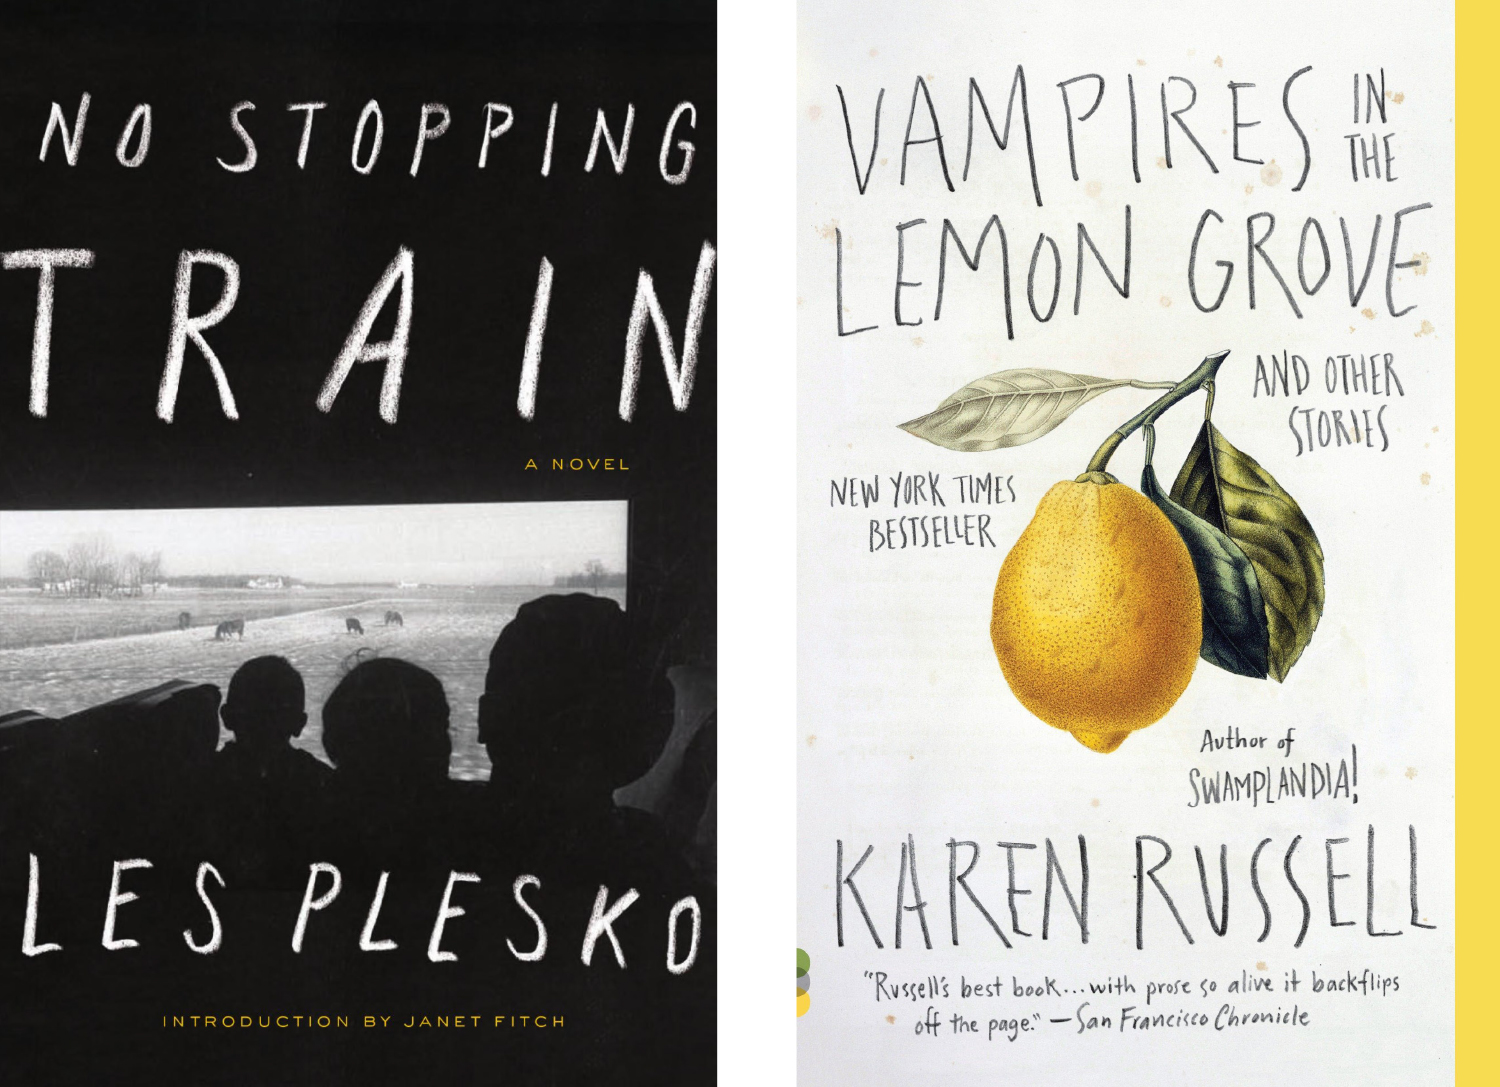
Fig. 7 (left). Cover design by Matt Dorfman. Fig. 8 (right). Cover design by Cardon Webb. Both great examples of unadorned uppercase lettering. Contrary to my beliefs, not every context requires the designer to show off her majestic lettering skills.
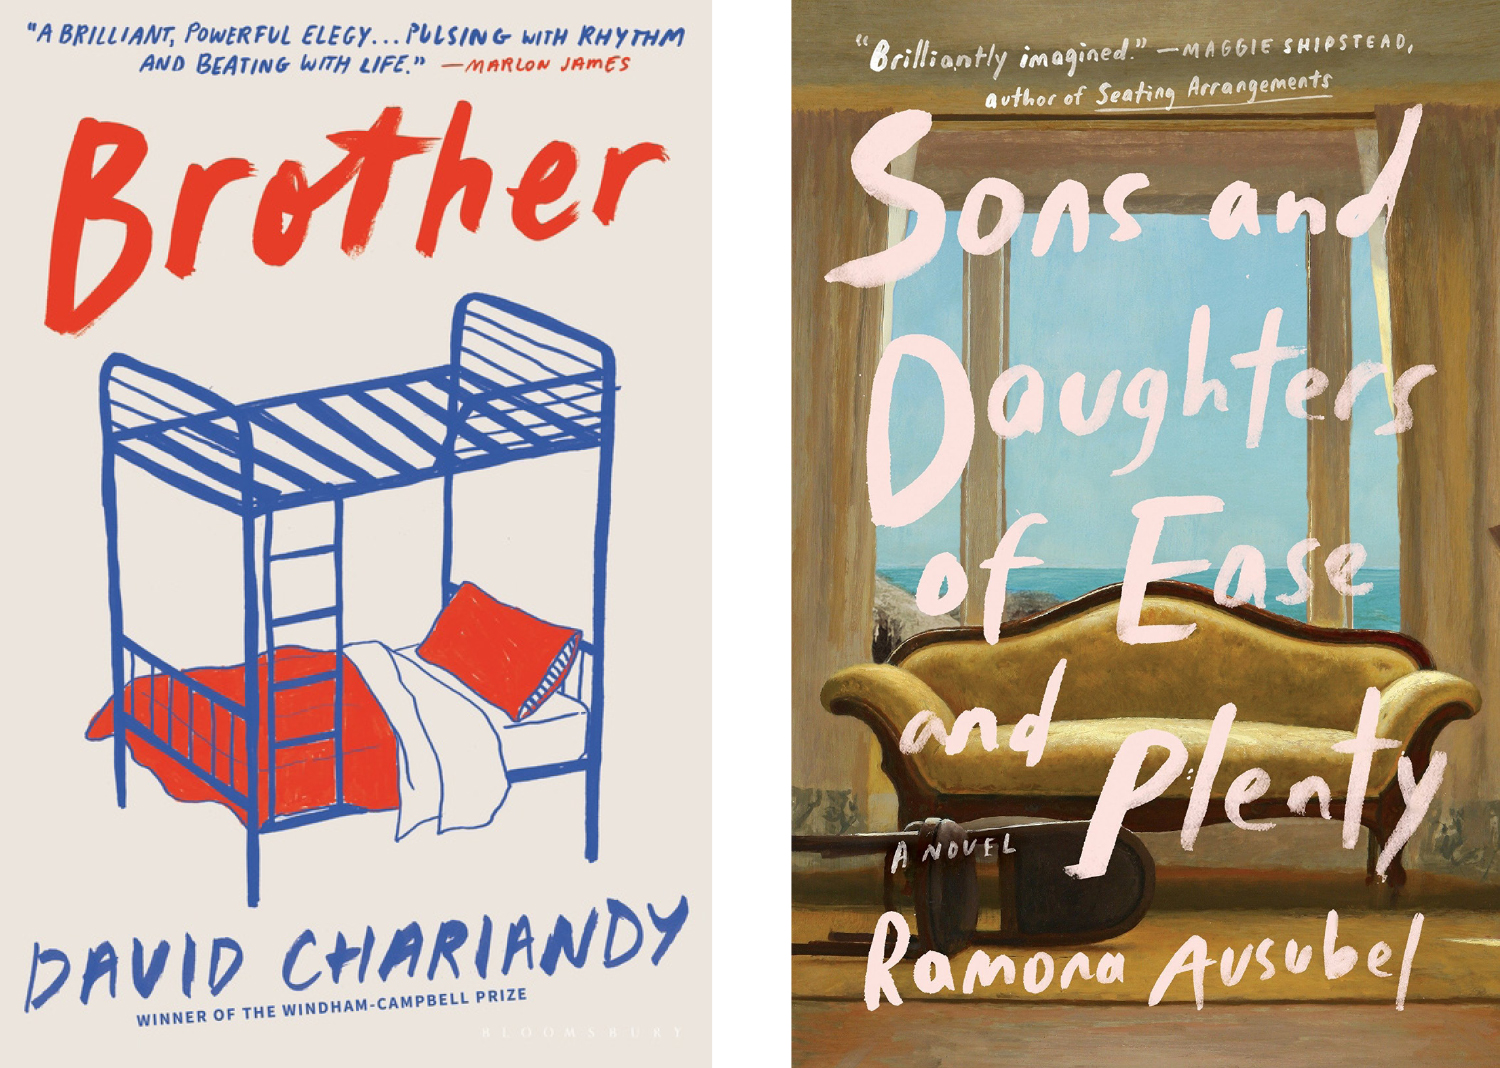
Fig. 9 (left). Cover design by Tree Abraham. Fig. 10 (right). Cover design by Grace Han. Love the simplicity of both. Note the different x-height and the slightly different effect it creates.
Quirky, playful, naif (one of my favorites, hence the numerous tips)
• Add complexity to the letters through ornaments, loops and swashes. (see Fig. 11, 12 and 13).
• Elongate ascenders and desdenders, including lowercase “t”. Yes, that last one might cause momentary sweats and palpitations. (See Fig. 14)
• Happily mix lowercase and uppercase letters (see Fig. 15 and 16).
• Write like a child learning cursive: all connected, rounded and slow (see Fig. 17).
• Randomly alternate between cursive and print styles, and space out some letters while connecting others (see Fig. 18 and 19).
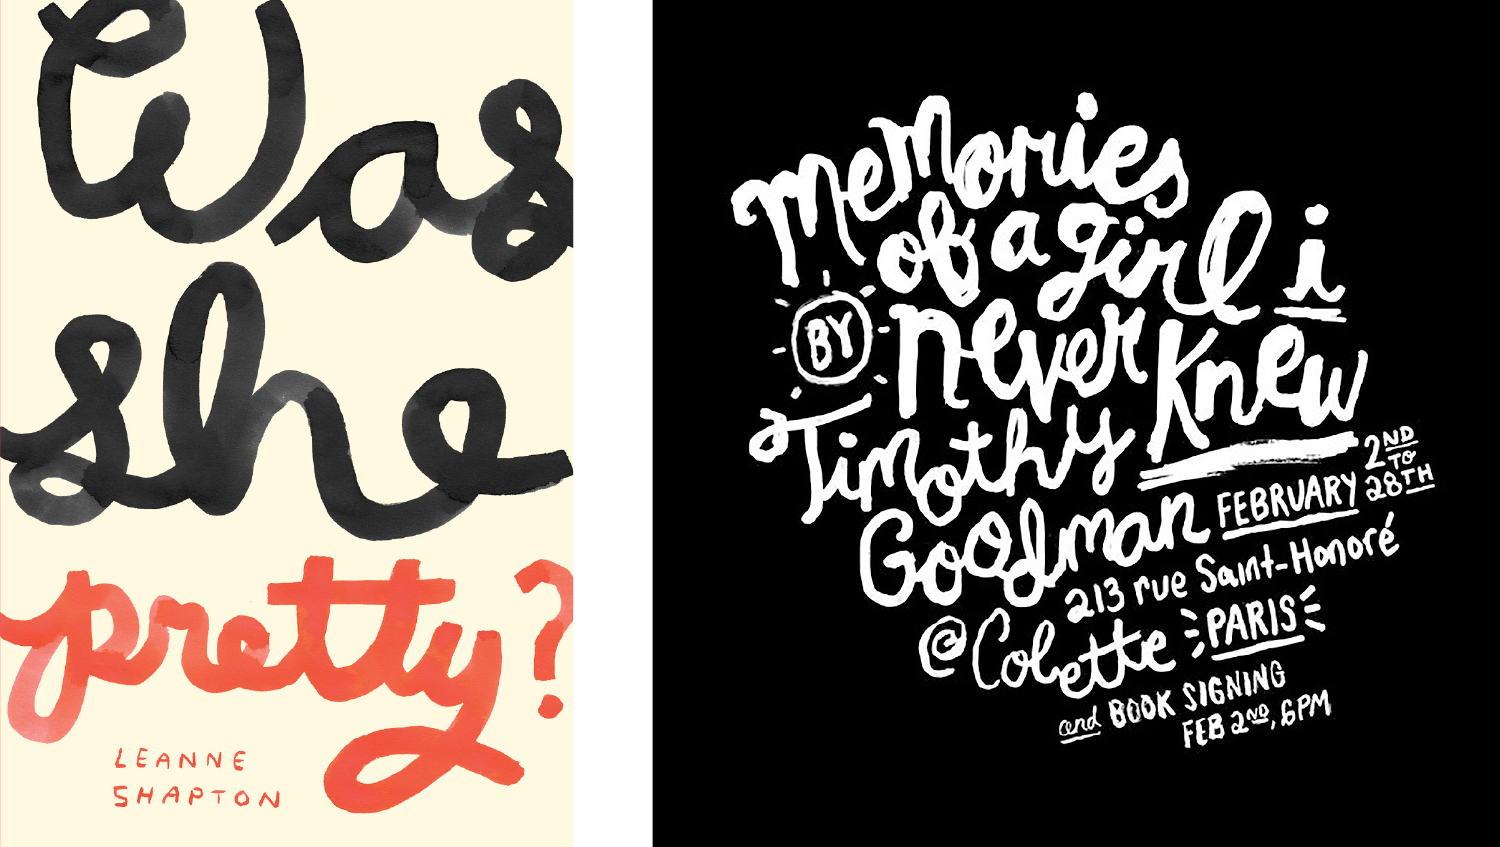
Fig. 11 (left). Cover design by Leanne Shapton. Fig. 12 (right). Lettering by Timothy Goodman. If you’re noticing lots of “curls” and “bubbles”, you’re on the right track.
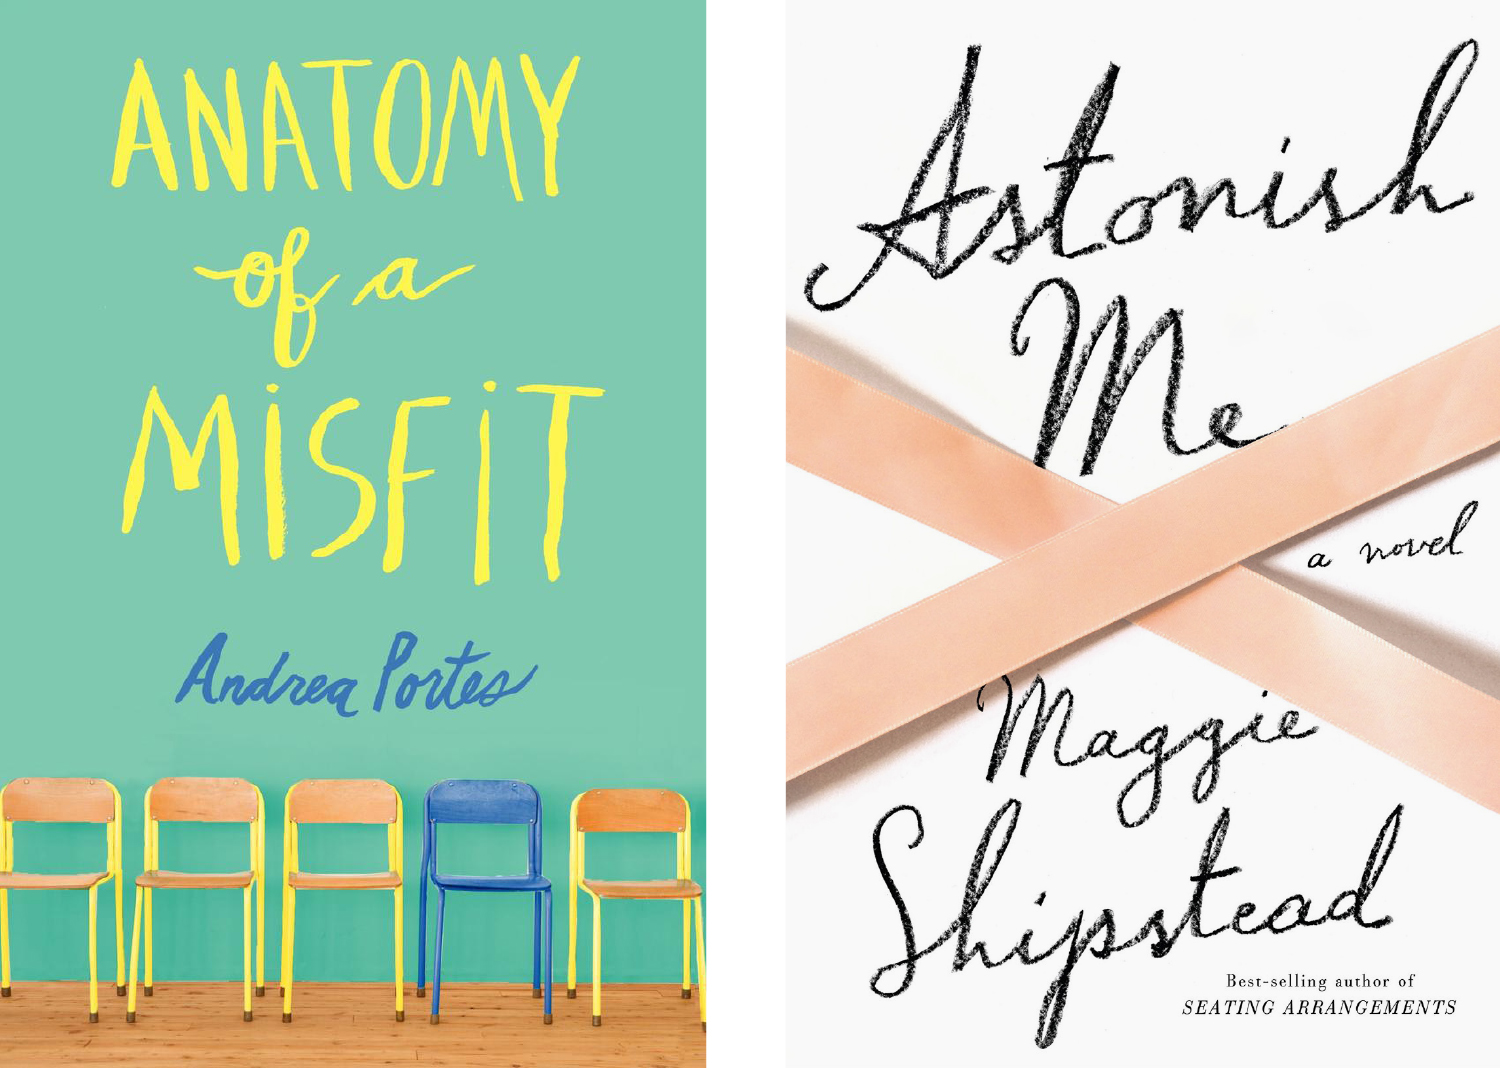
Fig. 13 (left). Cover design by Jessie Sayward Bright. The segment “of a” is adding a lot of fun to the cover through initial and terminal swashes and a joyfully loopy “of”. Fig. 14 (right). Cover design by Elena Giavaldi. A great example of the quirky effect of long ascenders and descenders, and accordingly, large capital letters. And see how lovely an “incorrect” tall “t” looks?

Fig. 15. Artwork by Oliver Jeffers. These charming clusters of uppercase and cursive lowercase get me every time.
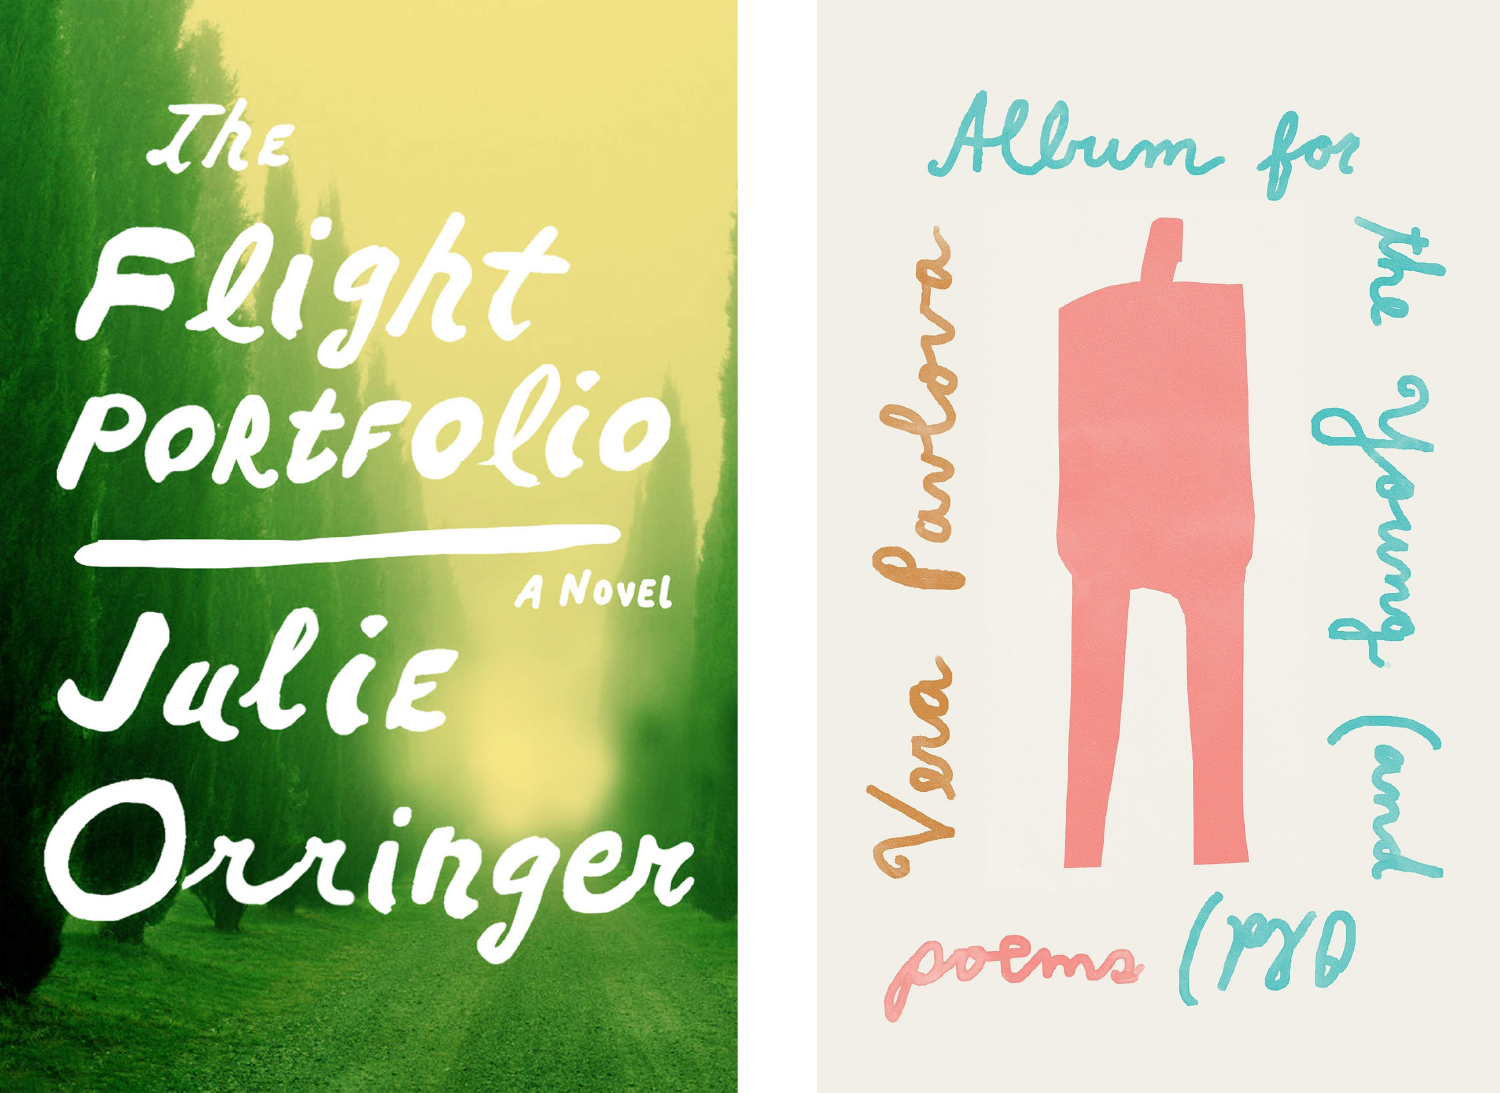
Fig. 16 (left). Cover design by Abby Weintraub. Note how lowercase and uppercase letters are alternating. Fig. 17 (right). Cover design by Janet Hansen. Love the endearing look of this one.
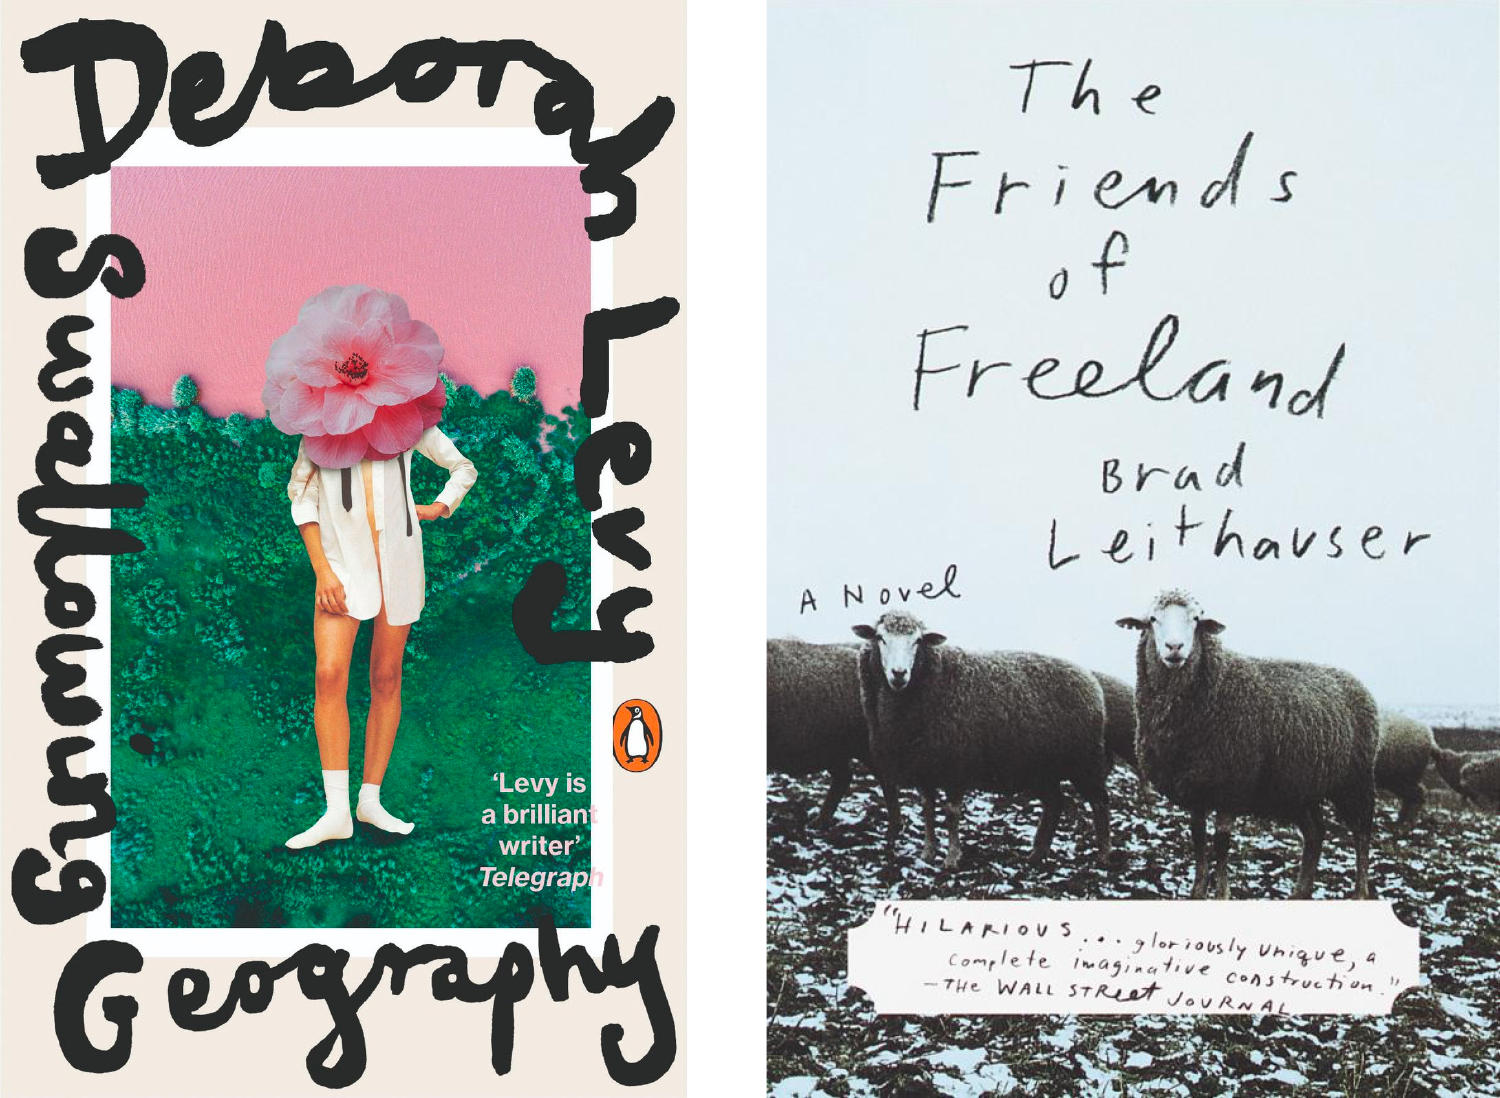
Fig. 18 (left). Cover design by Holly Ovenden. A particularly mouth-watering one I have to say. Fig. 19 (right). Cover design by Paul Sahre. Both are freely combining print and cursive, as well as mixing connected and unconnected letters.
Calm, agreeable, warm
• Avoid harsh corners by using fluid, rounded letterforms and connections if applicable (see Fig. 20 and 21).
• Keep it upright or softly slanted.
• Press gently on the tool.
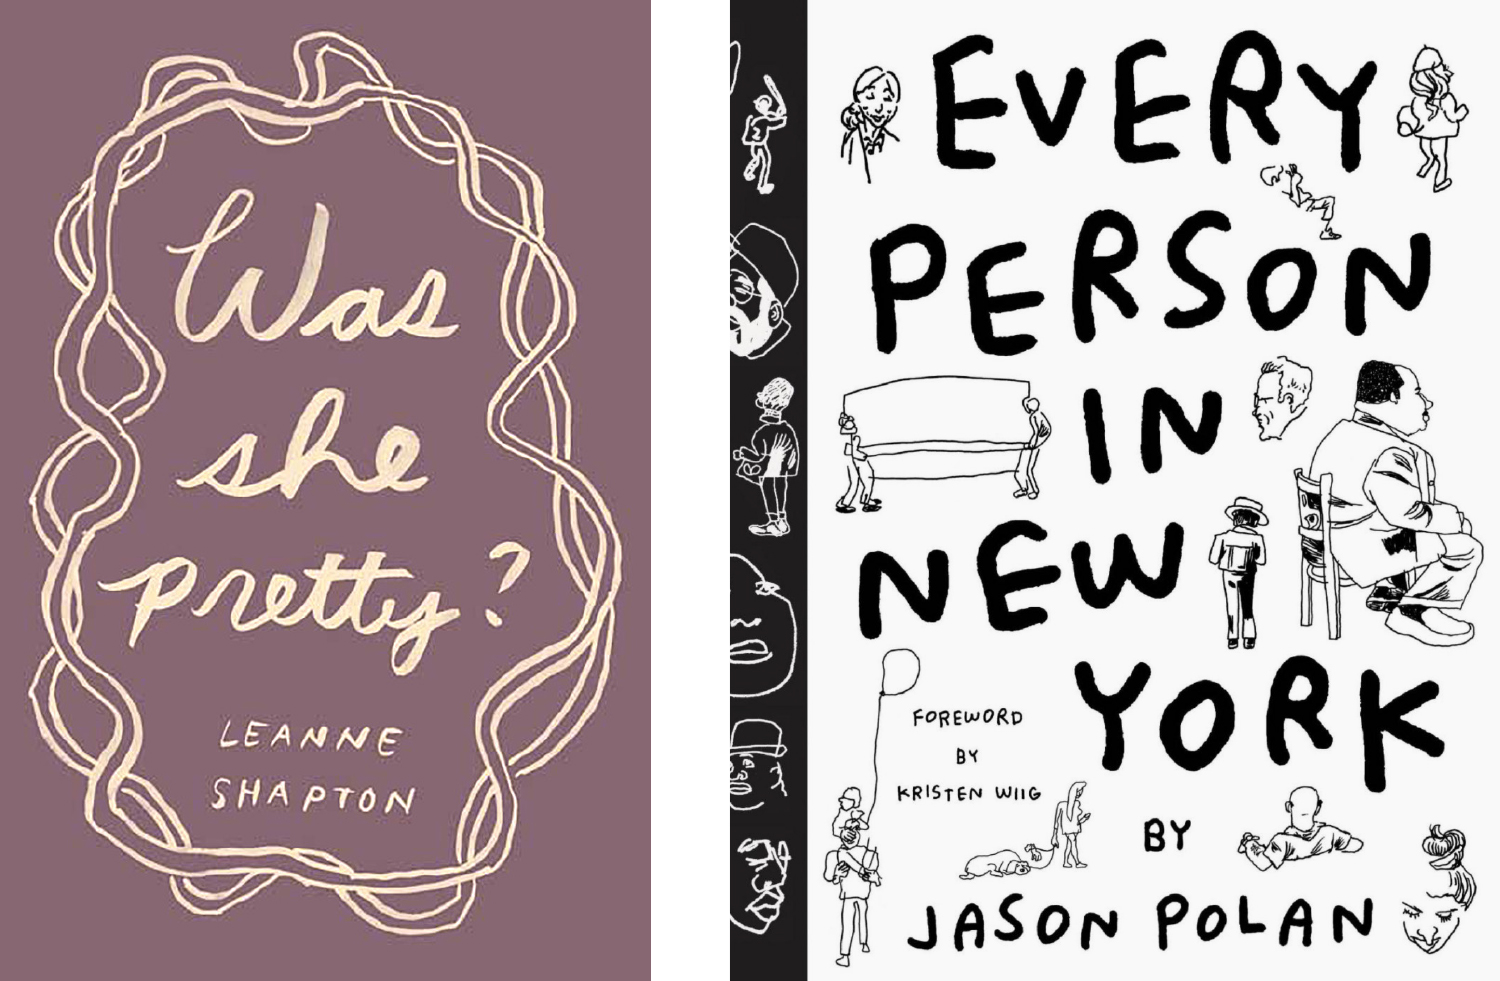
Fig 20 (left). Cover design by Leanne Shapton. Note the flowing, relaxed strokes that are mostly devoid of harsh angles. Fig. 21 (right). An example of capital letters with softened corners on Jason Polan’s cover. The choice of tool creates additional roundness.
Agitated, anxious, aggressive
• Use angular, pointed edges in letterforms and connections for a harsher look (see Fig. 23).
• Consider a slanted inclination for a more rushed feel.
• Press hard on the tool.
• Angrily rewrite on letters (see Fig. 24).
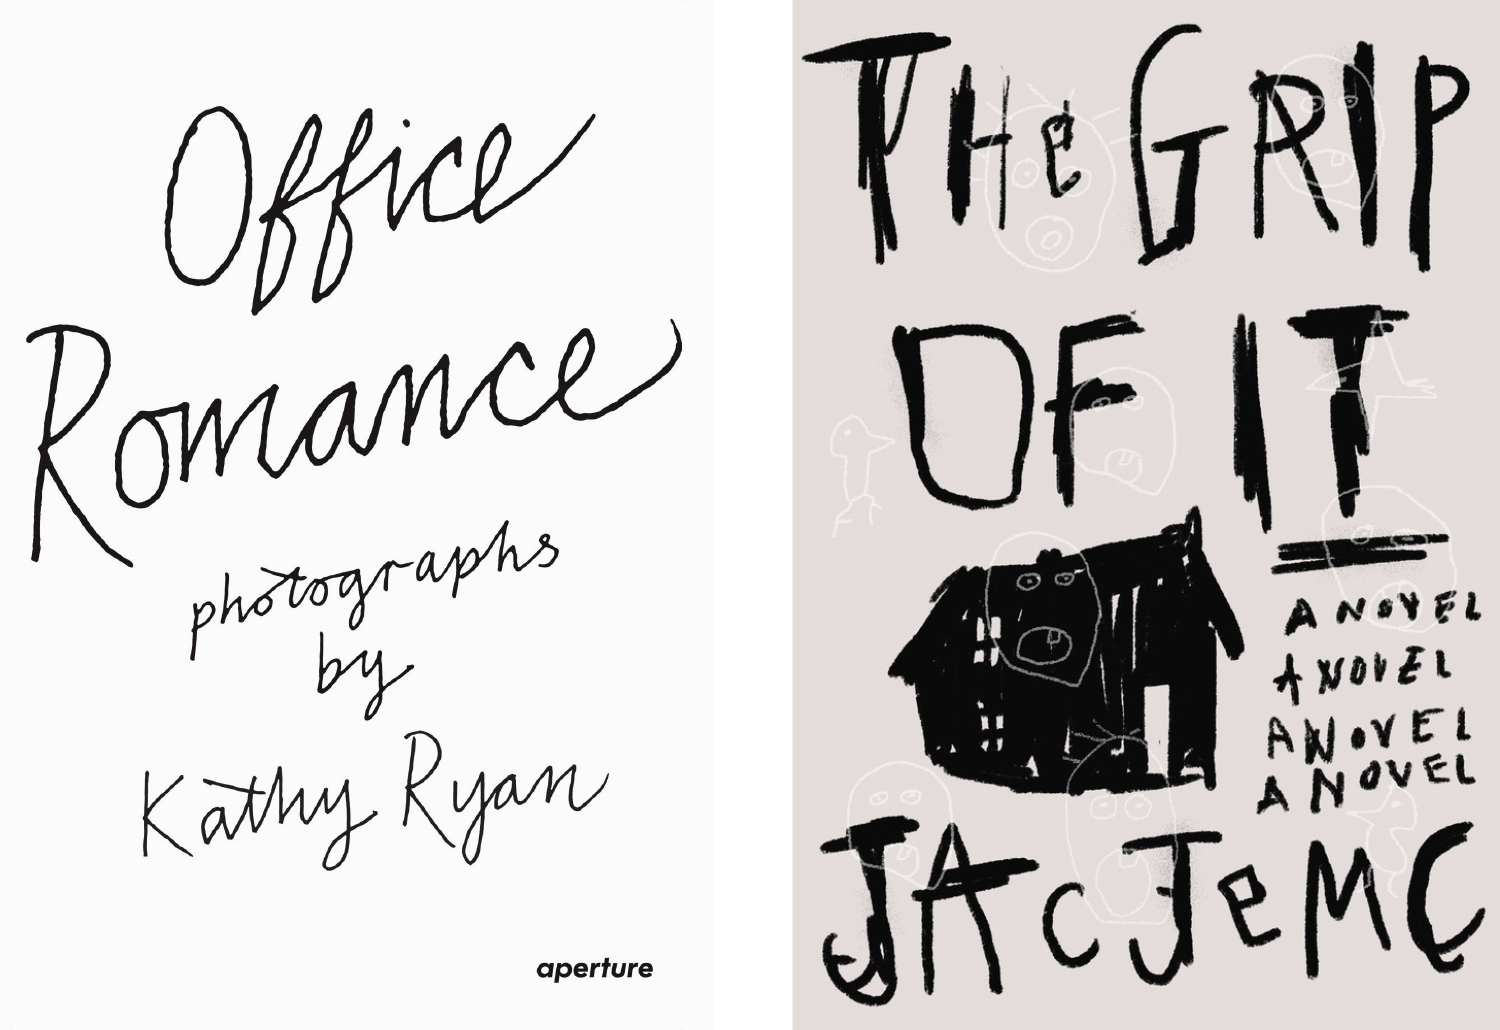
Fig. 23 (left). Cover design by Jon Gray/gray318. Note the sharp angles in letterforms such as the “f” or “m”, as well as in the connections between letters. Fig. 24 (right). Cover design by Alex Merto. The technique of rewriting on letters, which I generally refer to as “The Shining”, is quite effective at suggesting a troubled atmosphere.
I’m-so-clumsy
I’ll finish with this category of lettering which takes irregularity and imperfection to the next level. It can be achieved with simpler letterforms as well as with more ornamental ones (see Fig. 25 to 28). Ok, Fig. 24 can also go in here. A few tricks to get these results:
• Return to the irregularity section and go crazy with everything.
• Write with tip of brush, if using one. It’s harder to control and can give looser results.
• If you’re feeling brave, try using your other hand.
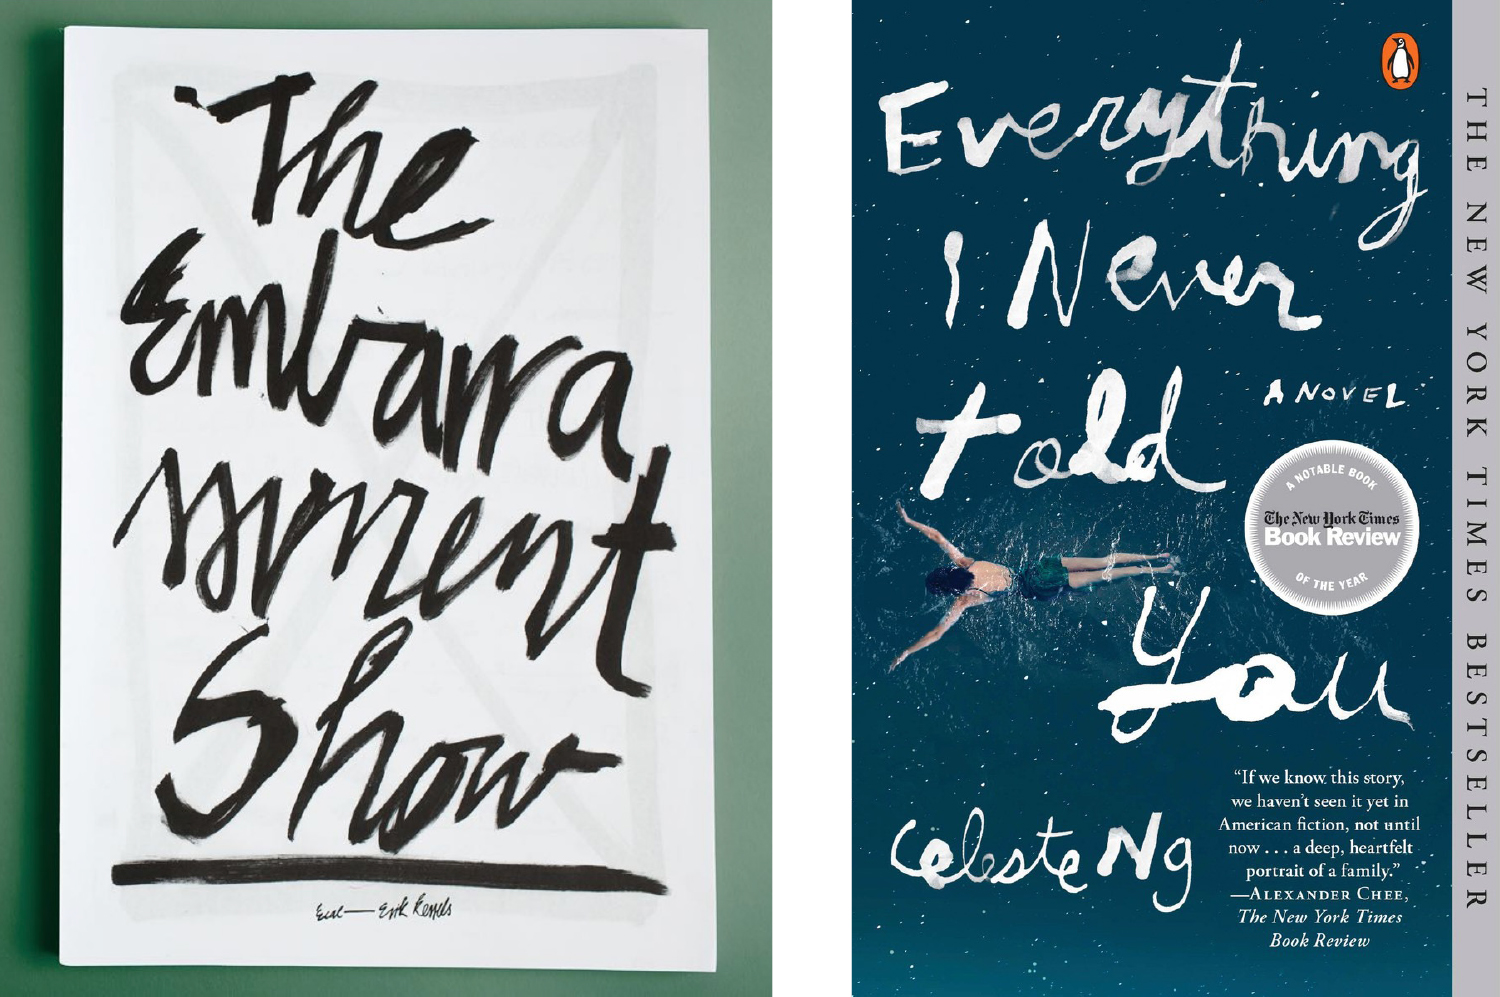
Fig. 25 (left). Poster lettering by Anna Kiosse. Fig 26 (right). Cover design by Adly Elewa. Great examples of “bad” lettering on purpose.
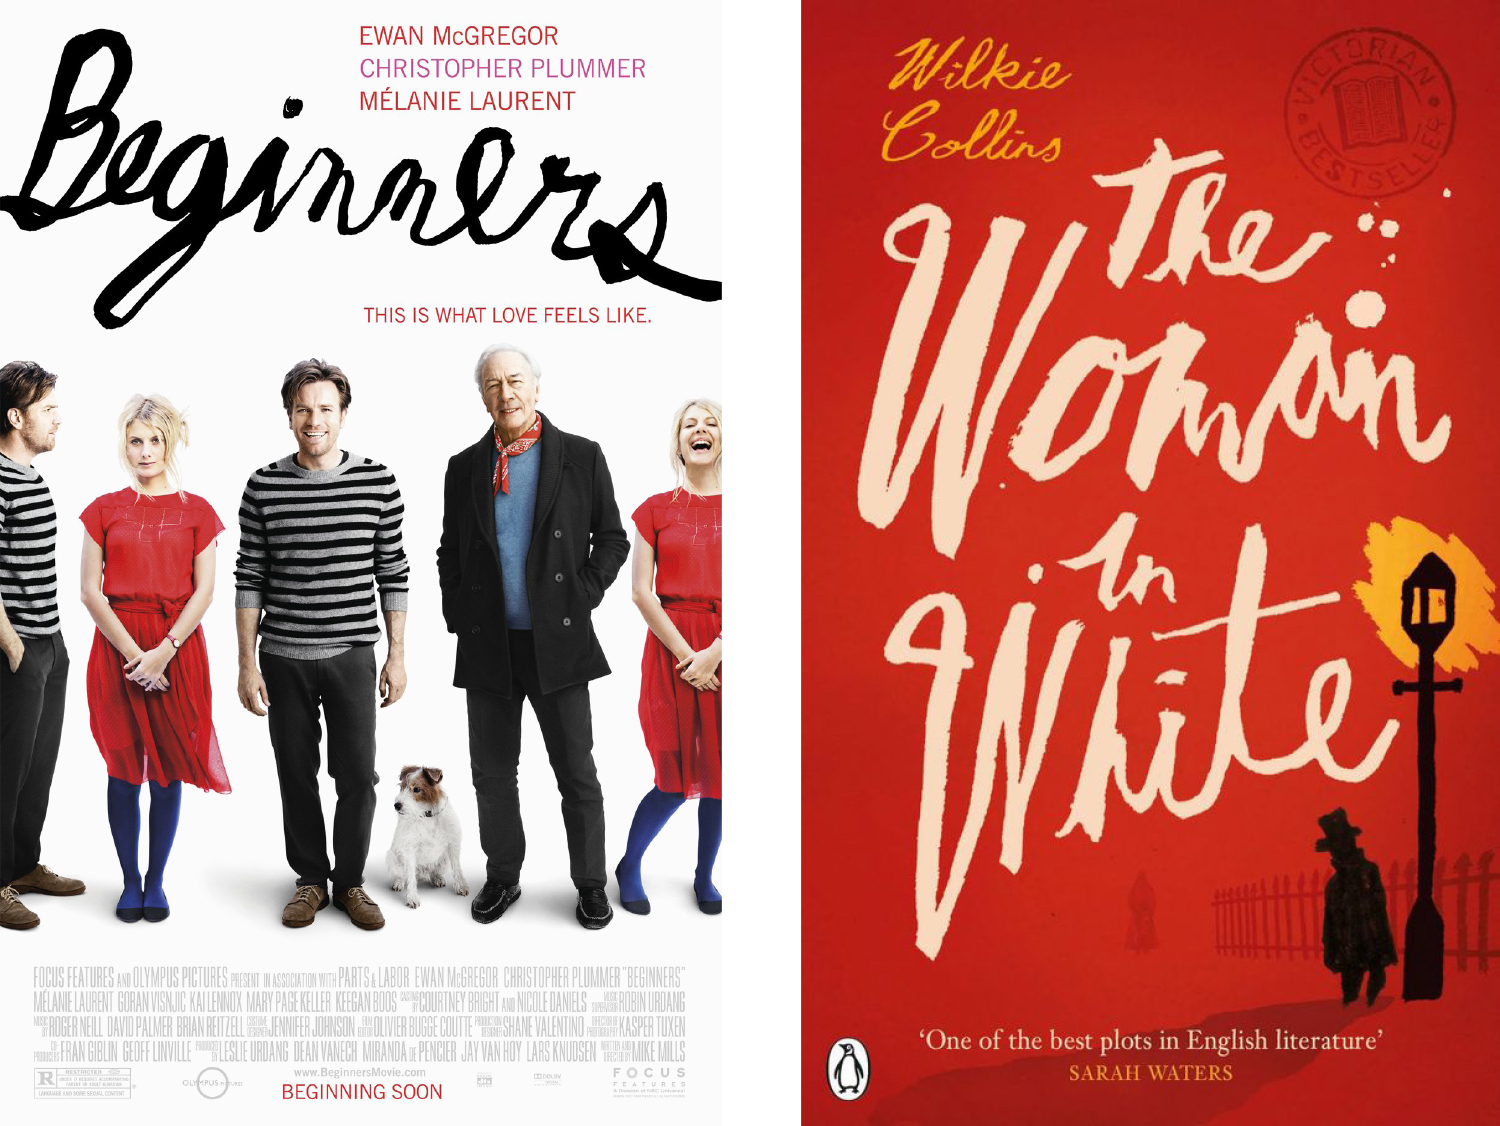
Fig. 27 (left). Poster lettering by director Mike Mills. Fig. 28 (right). Cover design by Richard Green. Just love the combination of clumsiness and slight ornamentation in both of these.
While this is the tentative, evolving list I have developed, there are countless expressive nuances one could wish to convey through lettering. A final tip I tend to go back to when feeling doubtful is to ask myself: if I were in that specific emotional state I am trying to express, how would I write? Quickly, slowly? Confidently large, or discreetly? I even apply this to the tool: would I use a rough, black crayon or translucent, delicate watercolor?
Following my own advice
So how is my lettering after all this? Theory is often easier than practice: the truth is that I am still in the process of mastering my own recommendations. However, I find that I now have a wider toolbox to work with and that I can make more appropriate choices depending on the content. Here are a few recent attempts at practicing these principles:
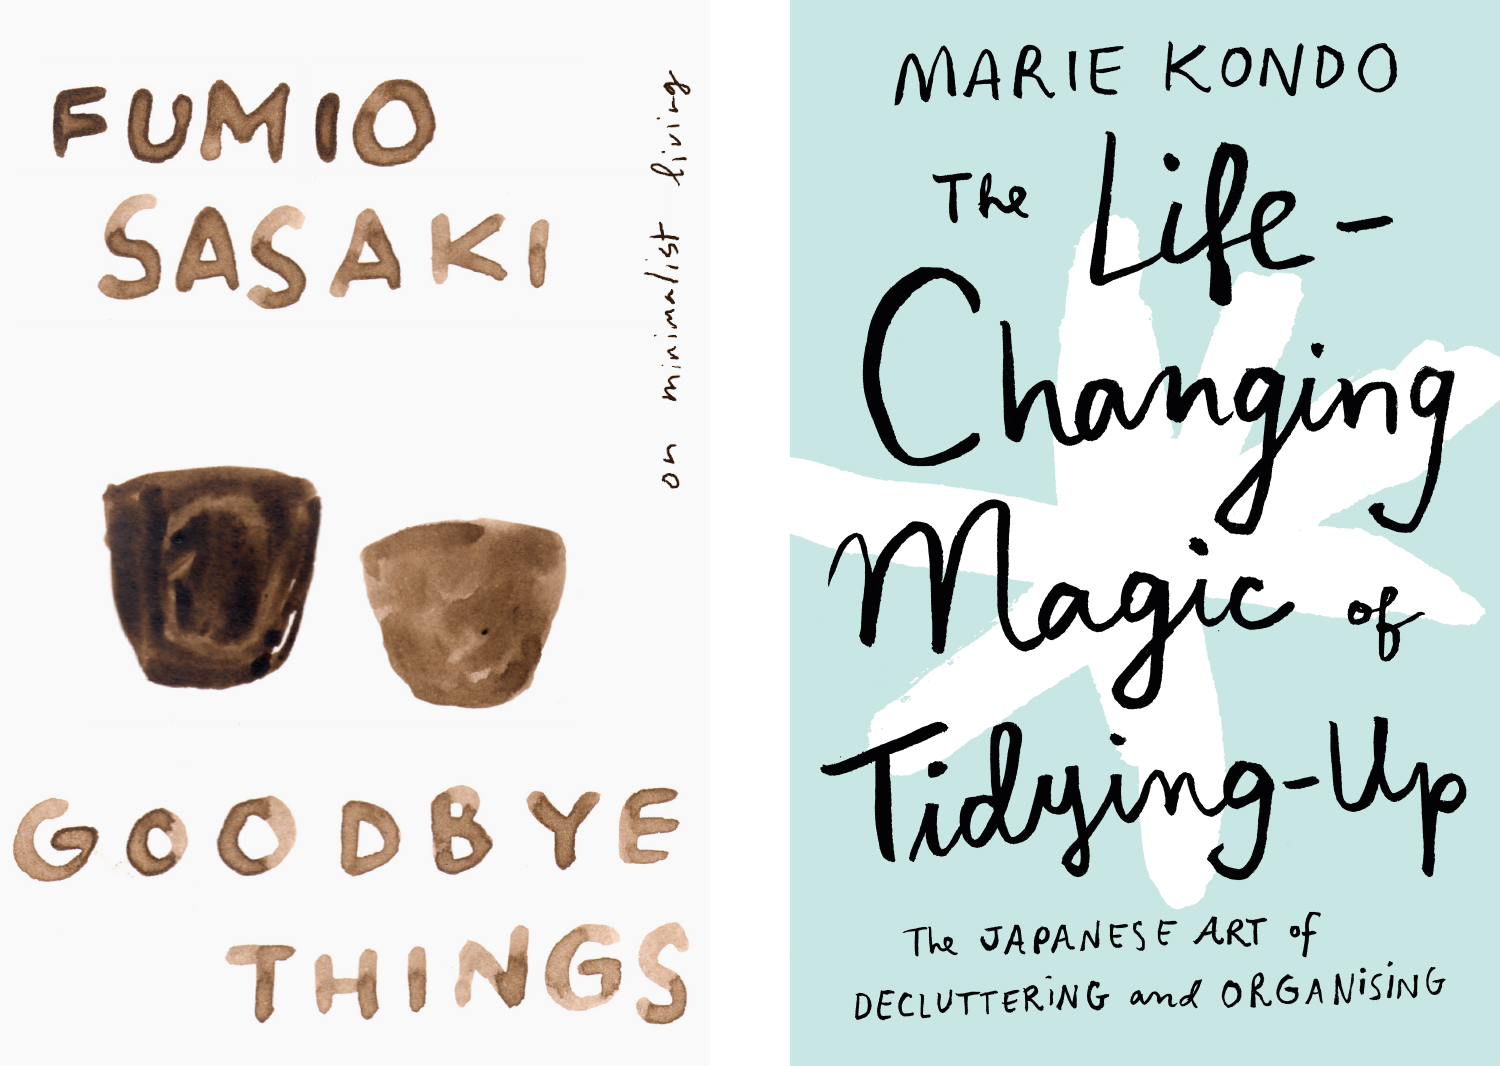
(Left) Personal cover. I thought a plain, warm, somewhat sloppy lettering would work well with the author’s candid account of his life as he simplified it. (Right) Personal cover. My shot at expressing Marie Kondo’s “sparkling” persona through a lightly ornamental cursive with a tiny x-height. Yes, I’m one of those minimalism fanatics.
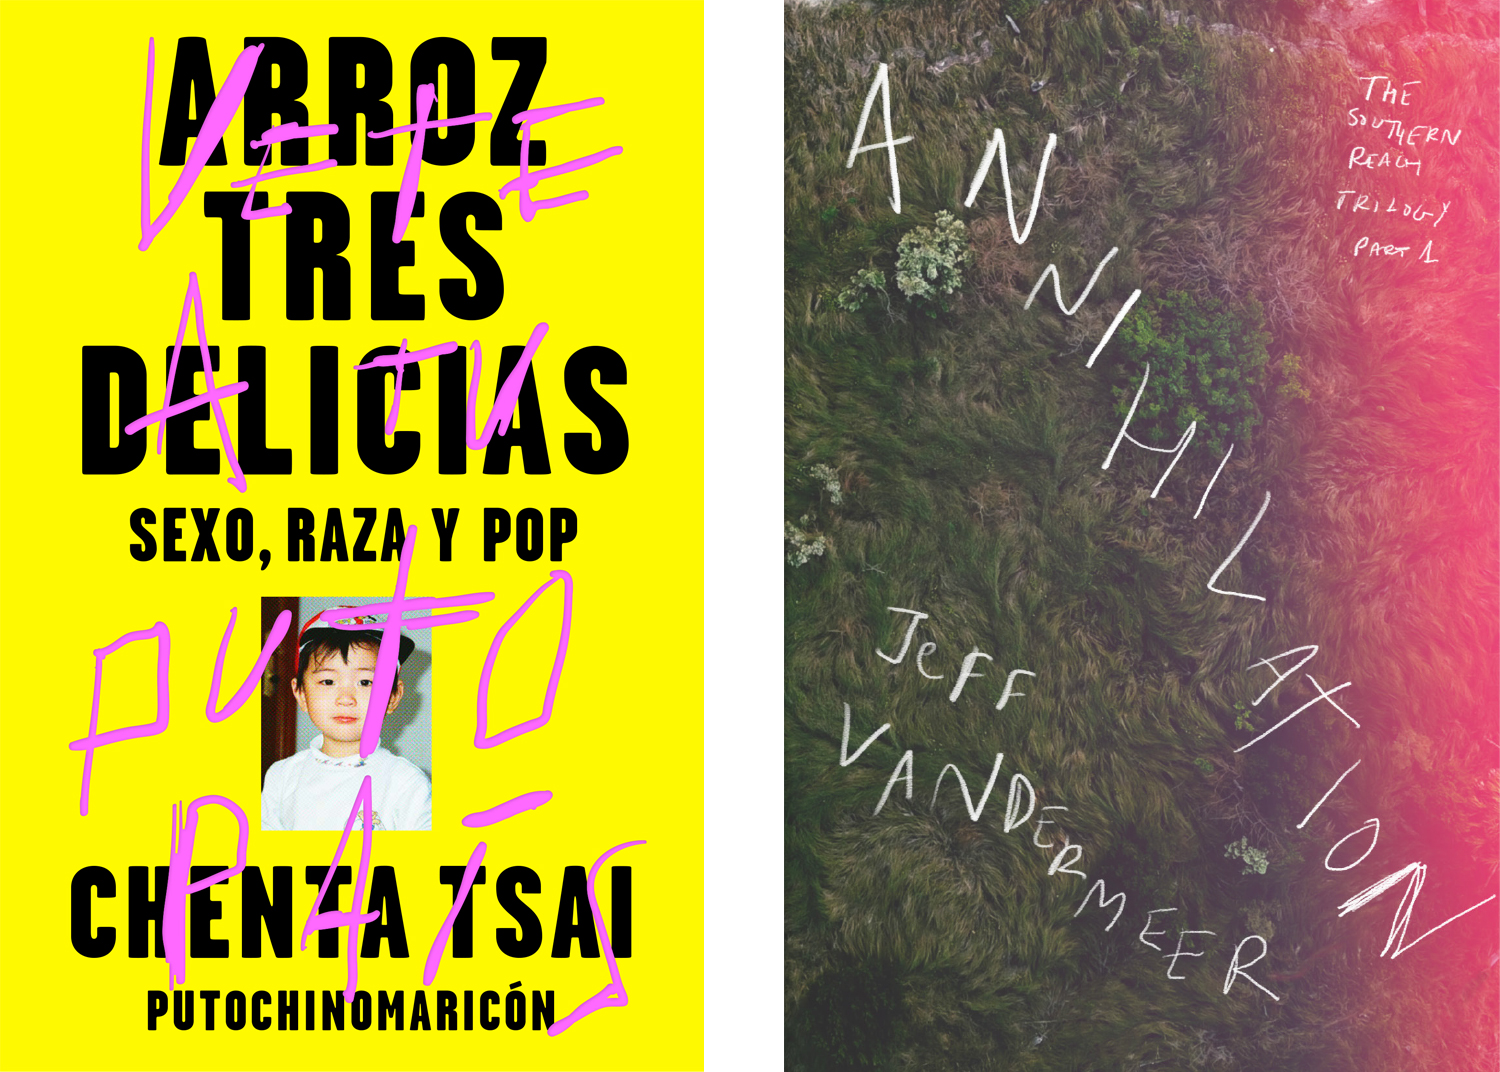
(Left) Killed cover for awesomely irreverent singer Chenta Tsai. Pretty proud of the sharp-edged lettering, which translates “Go back to your f**king country”. It was his idea. (Right) Personal cover for this horror science fiction novel I loved, for which I used a sinking, rough lettering to reflect the growing weirdness and spookiness of the story.
Conclusions
Behind each lettering I have been drooling over during this learning process, I have been sensing a skilled designer who deliberately made certain decisions and broke certain rules. So my advice is not to avoid learning proper lettering techniques but rather something you’ve heard before: learn the basics, get good, then unlearn them. That’s when it gets interesting. At least it has for me.
I have also asked myself why I have been attracted to this variety of imperfect, irregular handlettering styles. My tentative answer is that imperfection, irregularity and expressivity makes lettering —or anything— more human. Maybe this is why it draws me in. Don’t get me wrong, I will continue to admire the craftsmanship of impeccable, exceptionally skilled handlettering. I might just relate more to the clumsy, imperfect one.